Showing posts with label Softwares. Show all posts

5 Ashampoo softwares for free !! [cost $109.95]

Wednesday, March 14, 2012 | comments


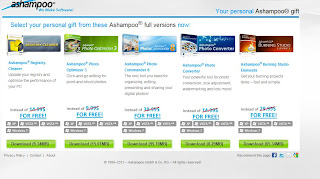
Here is a valuable change to get 5 Ashampoo softwares for Free ! The have offered this chance for these softwares cost $109.95

Ashampoo Burning Studio Elements
Ashampoo Registry-Cleaner
Ashampoo Photo Optimizer 3
Ashampoo Photo Commander 8
Ashampoo Photo Converter 


First visit here,

If you haven't ashampoo account register for a new account. Then click here and follow..

Click "Get downloads now"


Then you can see what you can get for free.


Now download what you need. After you installed one , a new tab will be opened in browser and will show registering keys. 


Copy it and paste.


Now enjoy...!! :D Don't miss this offer!

Tips on making Prezi Presentation more interactive

Tuesday, November 29, 2011 | comments (2)

 If you are using Prezi to create presentation, here are some of the tips and tricks to improve and to extend the limitations.
I assume that you have used Prezi before and have created couple of presentation using Prezi. If you are new to Prezi or have not used before, refer to my previous post on Prezi.
I have been using Prezi to create no of presentations and found out different methods to address some of the limitations on Prezi. If you are new to Prezi, just create couple of presentations before you continue this tutorial. So here are some of the limitations i found on Prezi and how to work around them. 
When a picture are zoomed in, it flicker or disappear  
There are two approaches, the most intuitive approach is to have a high resolution picture. but if you have tried this, you may have found that it is not a good approach.
My suggestion is to make the picture a SWF and import it as a SWF. SWF stands for Shockwave Flash and you can simply export your photo or image using Adove Illustrator or any other leading photo editing softwares.
How to add animations 
Again there are two approaches, either you can use a import as a Video or you can import as a SWF. There are pros and cons to both of them. If you add a video, it will start playing when it got the focus and it will remain still when you are viewing the background but if you use a SWF, it will animate even in the background. Of cause you need one of the Adobe softwares to convert between them or you can use online converters available on the internet.
What will be shown on the screen when I project this? How far it will show? 
This is vary critical if you are planing paths in between frames. If you have done a presentation on Prezi and presented using a projector, you might have noticed that the exact screen you saw on the screen is not what you see on the projector. (Most of the time right and left edges are different). This makes a presentation poor as what you planed to show ahead will be shown in this frame.
This is mainly because of the resolution problem. Most of the Projectors works on 4:3 ratio and the laptops and desktops screen aspect ration will be different to each other.
To overcome this issue, You can use standard frames when building your presentation. You can simply press SHIFT key and draw the frame, and Prezi will make the frame in to the ratio 4:3. So what will be shown on the projector is everything you put in to this frame. Most of the times, when you view this in your laptop it may show some excess things on top and bottom of the frames, but believe me it will not be shown on the projector. The other approach is simply to change the resolution of the laptop to 4:3 ratio resolution. This will make life more easier as what you see on the screen is exactly what you see in the Projector. Suggested resolution schemes is 1024x768.
When i focus on images, and text it will zoom more or does not zoom to the required level
This is where the frames comes in to play. I strongly recommend not to focus in to pictures or images. The best practice is to add a frame and focus on the frame, It makes more flexible and you easily change focus of different elements. Common practice is to build the story board and add frames accordingly. This will make sure every frame is on top of the story board and makes it more easy to manage.
How to rotate the camera?
This is a simple task. Add a frame and rotate it to the angle you want. Then add a path to it. Prezi will automatically rotate the camara and focus the frame up right in the meantime giving a nice spin effect. Beware: Do not spin so many times as it make distract the audience.
How to remove the Prezi logo on the bottom of the screen?
Prezi removes this logo or you can replace it with your own logo when you have a professional version. But if your are a student of a reputed University, you can ask for a Prezi EDU account which will allow you to remove this logo. All you need to do is sign up using the institutional email address with Prezi. I use my University of Moratuwa email to get away with this.
Can I use custom colours on my presentations?
Of cause you can use custom colours on the presentation. But you need to create a theme first. But using the new Prezi CSS editor, you can easily edit CSS of the presentation, which makes it more flexible to an advanced user.
Can I use Prezi on Powerpoint?
You can integrate both Powerpoint and Prezi. I will discuss this in a separate post
When I add a video, it will crop. Can I avoid this?
This is one of the critical problems I found on Prezi. There are couple of ways to work around but it may take considerable amount of time to archive this. One way is to change the background to suite the player. You can use background on the video. The second method makes it more attractive but you need a good knowledge in video editing to exactly match the background to the video itself.
Update - Prezi has added a lots of new features You can check them out from http://prezi.com/learn/new-features/
Here is a nice presentation I found on the internet, created by an intern in Prezi. There are no of suggestion to improve your presentation overall. I hope you enjoyed reading my article and if you have any questions regarding Prezi, add a comment and I will try my best to answer it.

How to hide, lock, invincible your files, folders or harddisks

Monday, November 28, 2011 | comments (1)

Everyone has certain files that s/he would rather keep private, especially guys. One of the ways to do that is to make such files hidden and bury them deep in the system files. The problem with such approach is that it’s not really convenient if you need to access those files on a regular basis.
So if you’re interested in something more convenient, here are some of the ways to keep “important” files or drives invisible hidden or locked.

1. Click “Start”, “Run,” and then type cmd. When the command prompt opens type “CD C:Test” (replace “Test” with the name of the folder you want to hide.)2. Now type “attrib file +s +h” and replace “file” with the name of the actual file name you would like to hide.3. Now, go back to C:Test and look for your file or folder, it’s not there! You cannot find it through simply browsing around, through the command prompt, or even if you click “Show Hidden Files and Folders”.4. To find the folder and its contents again simply go back to the command prompt, type “CD C:Test” (of course, again replacing “Test” with the name of the folder,) and then type “attrib filename -s -h”. You should now be able to find your file again!Method 2
This works both on Windows XP and Vista, not sure about other Win versions. What this will do is make selected folder invisble, not hidden. The folder will be only visible when you try to highlight it (see below). If you want to make sure that no one discovers it by chance then also move it to the corner of the screen.
Create a new folder.Rename: Highlight the folder and Click ‘F2' button. Hold the ‘Alt’ key and type in 0160 (you won’t see those 0160 numbers while typing them). Press Enter. Note, you have to use the numpad to enter these numbers.Change icon: Righ click the folder >> Properties >> Customize >> Change the icon >> Select the blank one >> Ok.
Method 3 (this is where it starts to get slightly more difficult)This method, unlike the previous one, hides an entire drive instead of individual files or folders:(Before you ever use the registry I HIGHLY RECOMMEND backing up your registry with a tool similar to Registry Tool or CCleaner. You may as well use a manual method similar to this.)1. Go to “Start,” “Run,” and type regedit.2. When the registry editor loads, navigate to: HKEY_LOCAL_MACHINESoftwareMicrosoftWindowsCurrentVersion
PoliciesExplorer3. Right click on “Explorer” and select “New” and “DWORD Value.”4. Name the value NoDrives and select “Decimal” as the base.5. In the value type the number that corresponds with the drive below:(E.g. If you would like to hide drive E, type 16. You may also hide multiple drives by adding the two numbers. E.g. If you would like to hide drives E and G, 16+64=80.)6. Now, after you restart your computer, you should not be able to see the drive.1. Create a folder in a drive for easy access, e.g. C:. (Name it something related to the Control Panel, e.g. Users.)2. Create a new file in Notepad and copy and paste the following into it:ren Users Users.{21EC2020-3AEA-1069-A2DD-08002B30309D}3. Replace “Users” with the name of the folder you created and save the file as loc.bat.(You should now be able to see your folder and the loc.bat file, with the loc.bat in the same directory as the folder Not in it.)4. Now, right-click and create another text file. Copy and Paste the following into it:ren Users.{21EC2020-3AEA-1069-A2DD-08002B30309D} Users
(Make sure to replace the word “Users” with the name of your folder.)6. Now you should see the loc.bat and the key.bat files in the same directory as the folder you created.7. Now, all you need to do is double-click on the loc.bat file and the folder should have an icon that looks like the control panel. If you click on the folder it should redirect you to the Control Panel and thus you have locked the folder.8. Of course, to unlock it, simply double-click on the key.bat file and the folder should turn back into the folder you first created.

Temporary Mail

| comments (1)

Ever wanted a quick, easily setup e-mail account when you suffer internet, when you register for services and still remaining your email account secure and avoid spamming from those sites? Then you are in need of a temporary or a disposable mail account.
There are two types of temporary mail accounts1.       Expires over time – you are given some time to use it and the inbox will be cleared after that time period.2.       Remains over time – all the mail to this accounts are remain irrespective of the time. ·         Use to log in to forums, decision groups, chat rooms and play around easily·         Some information on forums are hidden and only be seen to members. ·         Can be used as a secondary mail and even forward them to your mail. Well following listed are some of the first page hits I got from a simple Google search. There are thousands of free temporary mail providers on the internet. Just stick to a few so that you know how to get it done easily. These are the ones I use. All of them support reply, forward, and send message as the new mail account.You only need to enter the username and you will be taken to your mailbox. But use with caution. If anybody who know you email address can access to it. If you need a mail account not to be reset. This is a good choice.As the name implies it only available for 10 minutes. You can extend if you want. One advantage is that your are at the inbox of your gven a mail account as you enter the site. So no need to enter a user id.  Just copy it and you can use it.This can you used to forward mail from your new account to a account you specified for a given time period.

Create Stunning Presentations

Saturday, November 26, 2011 | comments

Would you like to do stunning presentation? Leave the old transition based Power Point presentations. It is time to switch to storytelling presentation. It is all about the new era of presentation. “Prezi” ,  a Flash based online Presenting / Story Telling application.

This is the coolest presentation tool I have ever used and yet it is free of charge too. Here is the official intro  on Prezi. It would not take more than 1 min to watch it but I will guarantee you that it will save more than thousands of your boring presentation seconds. Working with Prezi is easy just go to Prezi and create a account and start building prezi. Be sure to visit their showcase to see what are the potentials and some useful template you can use to your presentation.

Temporarily disable Flash Debugger Errors

| comments (2)

Annoyed with the flash debugging errors comes up when you are browsing?Why do i keep getting a flash error in win 7? Want to temporary disable them? It is just a line you need to add to the configuration file.
These errors are showing because you have installed a flash player debugger version instead of the normal flash player. You can check your current player version from Adobe.

The easiest way to not get these error dialogues at all is to install the normal "release" version of the player. If you never debug SWFs in the browser, you can install the plugin/AX control there and not have to worry about it again, though this can be inconvenient if you do actually debug in the browser (which is more than likely the case for Flex users).
Once I was looking for this. I did not find a better tutorial on the internet. I found out the answer after reading several forums. So here is how you can do it.
Locate the configuration file of your adobe flash debugger. Check the path from the below table and the file name is mm.cfg Operating systemCreate file in ???/Library/Application Support/Macromedia C:\Documents and Settings\username
Open the configuration file in notepad and add the following line
SuppressDebuggerExceptionDialogs=1
Restart the browserRemember to restore those lines when you are debugging. :D Cheers!!

How to enable designer view in PHPMyAdmin

Friday, November 25, 2011 | comments (67)


Want to create relations between tables using a drag and drop GUI on PHPMyAdmin ?
This is a tutorial on how to enable designer view in PHPMyAdmin to easily manage tables and relations in between them. 
I assume you are familiar with PHPMyAdmin, GUI and already installed it on your machine. First check whether you have already enabled the designer view before going into any of the configurations.
Go to PHPMyAdmin and select a database (not a table). It should be something like below if you have designer view enabled. I am repeating again DO NOT select any tables.

If you can not see a tab called a "Designer". You need to configure PHPMyAdmin to enable it. Open config file of your PHPMyAdmin. If you use WAMP, XAMPP or LAMP or similar distribution the config file is at
path to the distribution\phpMyAdmin\libraries\config.default.php
Edit the config file and change the following fields as shown bellow.
$cfg['Servers'][$i]['pmadb'] = 'phpmyadmin';
$cfg['Servers'][$i]['bookmarktable'] = 'pma_bookmark';
$cfg['Servers'][$i]['relation'] = 'pma_relation';
$cfg['Servers'][$i]['table_info'] = 'pma_table_info';
$cfg['Servers'][$i]['table_coords'] = 'pma_table_coords';
$cfg['Servers'][$i]['pdf_pages'] = 'pma_pdf_pages';
$cfg['Servers'][$i]['column_info'] = 'pma_column_info';
$cfg['Servers'][$i]['history'] = 'pma_history';
$cfg['Servers'][$i]['designer_coords'] = 'pma_designer_coords';
Create a database on phpMyAdmin named “phpmyadmin” without quotes and execute the following sql code.
-- --------------------------------------------------------
-- SQL Commands to set up the pmadb as described in Documentation.html.
--
-- DON'T RUN THIS SCRIPT ON MySQL 4.1.2 AND ABOVE!
-- Instead, please run create_tables_mysql_4_1_2+.sql.
--                                                
-- This script expects the user pma to already be existing. If we would put a
-- line here to create him too many users might just use this script and end
-- up with having the same password for the controluser.
--                                                    
-- This user "pma" must be defined in config.inc.php (controluser/controlpass)                        
--                                                 
-- Please don't forget to set up the tablenames in config.inc.php                                
--
-- $Id: create_tables.sql 10257 2007-04-07 14:40:24Z lem9 $
-- --------------------------------------------------------
--
-- Database : `phpmyadmin`
--
DROP DATABASE IF EXISTS `phpmyadmin`;
CREATE DATABASE `phpmyadmin`;
USE phpmyadmin;
-- --------------------------------------------------------
--
-- Privileges
--
GRANT SELECT, INSERT, DELETE, UPDATE ON `phpmyadmin`.* TO
'pma'@localhost;
-- --------------------------------------------------------
--
-- Table structure for table `pma_bookmark`
--
CREATE TABLE `pma_bookmark` (
`id` int(11) NOT NULL auto_increment,
`dbase` varchar(255) NOT NULL default '',
`user` varchar(255) NOT NULL default '',
`label` varchar(255) NOT NULL default '',
`query` text NOT NULL,
PRIMARY KEY  (`id`)
) TYPE=MyISAM COMMENT='Bookmarks';
-- --------------------------------------------------------
--
-- Table structure for table `pma_column_info`
--
CREATE TABLE `pma_column_info` (
`id` int(5) unsigned NOT NULL auto_increment,
`db_name` varchar(64) NOT NULL default '',
`table_name` varchar(64) NOT NULL default '',
`column_name` varchar(64) NOT NULL default '',
`comment` varchar(255) NOT NULL default '',
`mimetype` varchar(255) NOT NULL default '',
`transformation` varchar(255) NOT NULL default '',
`transformation_options` varchar(255) NOT NULL default '',
PRIMARY KEY  (`id`),
UNIQUE KEY `db_name` (`db_name`,`table_name`,`column_name`)
) TYPE=MyISAM COMMENT='Column information for phpMyAdmin';
-- --------------------------------------------------------
--
-- Table structure for table `pma_history`
--
CREATE TABLE `pma_history` (
`id` bigint(20) unsigned NOT NULL auto_increment,
`username` varchar(64) NOT NULL default '',
`db` varchar(64) NOT NULL default '',
`table` varchar(64) NOT NULL default '',
`timevalue` timestamp(14) NOT NULL,
`sqlquery` text NOT NULL,
PRIMARY KEY  (`id`),
KEY `username` (`username`,`db`,`table`,`timevalue`)
) TYPE=MyISAM COMMENT='SQL history for phpMyAdmin';
-- --------------------------------------------------------
--
-- Table structure for table `pma_pdf_pages`
--
CREATE TABLE `pma_pdf_pages` (
`db_name` varchar(64) NOT NULL default '',
`page_nr` int(10) unsigned NOT NULL auto_increment,
`page_descr` varchar(50) NOT NULL default '',
PRIMARY KEY  (`page_nr`),
KEY `db_name` (`db_name`)
) TYPE=MyISAM COMMENT='PDF relation pages for phpMyAdmin';
-- --------------------------------------------------------
--
-- Table structure for table `pma_relation`
--
CREATE TABLE `pma_relation` (
`master_db` varchar(64) NOT NULL default '',
`master_table` varchar(64) NOT NULL default '',
`master_field` varchar(64) NOT NULL default '',
`foreign_db` varchar(64) NOT NULL default '',
`foreign_table` varchar(64) NOT NULL default '',
`foreign_field` varchar(64) NOT NULL default '',
PRIMARY KEY  (`master_db`,`master_table`,`master_field`),
KEY `foreign_field` (`foreign_db`,`foreign_table`)
) TYPE=MyISAM COMMENT='Relation table';
-- --------------------------------------------------------
--
-- Table structure for table `pma_table_coords`
--
CREATE TABLE `pma_table_coords` (
`db_name` varchar(64) NOT NULL default '',
`table_name` varchar(64) NOT NULL default '',
`pdf_page_number` int(11) NOT NULL default '0',
`x` float unsigned NOT NULL default '0',
`y` float unsigned NOT NULL default '0',
PRIMARY KEY  (`db_name`,`table_name`,`pdf_page_number`)
) TYPE=MyISAM COMMENT='Table coordinates for phpMyAdmin PDF output';
-- --------------------------------------------------------
--
-- Table structure for table `pma_table_info`
--
CREATE TABLE `pma_table_info` (
`db_name` varchar(64) NOT NULL default '',
`table_name` varchar(64) NOT NULL default '',
`display_field` varchar(64) NOT NULL default '',
PRIMARY KEY  (`db_name`,`table_name`)
) TYPE=MyISAM COMMENT='Table information for phpMyAdmin';
-- --------------------------------------------------------
--
-- Table structure for table `pma_designer_coords`
--
CREATE TABLE `pma_designer_coords` (
`db_name` varchar(64) NOT NULL default '',
`table_name` varchar(64) NOT NULL default '',
`x` INT(11) default NULL,
`y` INT(11) default NULL,
`v` TINYINT(4) default NULL,
`h` TINYINT(4) default NULL,
PRIMARY KEY (`db_name`,`table_name`)
) TYPE=MyISAM COMMENT='Table coordinates for Designer'
That it Now you can access the designer tab on PHPMyAdmin. For more details refer

Create Windows Desktop Shortcuts easily with Handy Shortcuts

| comments (27)

Like to have shortcuts useful application on your desktop? Shortcut to Shut-down, Hibernate ...
Handy Shortcuts is a free portable app for Windows 7 and Windows Vista that can add up to 20 different Windows functions as shortcuts to your desktop. Simply download and run the executable file, then click > Create next to the Windows functions you wish to see as shortcuts on your desktop.
My favorite three shortcuts are:
Shutdown WindowsAdd and Remove ProgramSafely Remove HardwareOf cause you can add them using the a normal shortcut with the path to those applications if you are advanced user. But this will make your life easier.
Handy Shortcuts has been created by Ritesh Kawadkar for The Windows Club, and has been tested on Windows 7 & Vista, 32-bit & 64-bit. 

Keep Google From Tracking Your Every Move Online

Thursday, November 24, 2011 | comments (10)

Google offers many helpful web tools that make our lives easier, but it also collects an enormous amount of data about its users. Here’s how you can opt-out of some automatic data collection and preserve a bit more privacy.

Privacy has been a big issue online lately, and many people have been trying to cut back on the amount of information they share about themselves online.  But 2 popular Google services, Analytics and AdSense, both collect data about you from many sites you visit across the internet.  With these quick tricks, though, you can opt-out of some of Google’s data collection.
Opt out of Google Analytics Tracking
Google Analytics is a popular service that web publishers use to find out information about the visitors to their site and their number of page views over time.  This information can be very helpful for optimizing websites.  However, it does mean that Google is collecting information about your visits to many sites across the web.
If you’d like to opt-out of this data collection, Google has a simple browser add-in you can install to prevent Analytics from collecting information about your visit.  Head over to the Google Analytics Opt-out site (link below), and click the Get Google Analytics Opt-out Browser Add-on button.  The site will detect the browser you’re using, and offer you the correct add-on.

Visit the site in your favorite browser, and follow the steps below to install on each browser
Google Chrome
When you click the button above in Google Chrome, it will redirect you to the addon’s page in the Extension directory.  Click Install.

Now click Install again in the popup to verify that you want to install the extension.  Now your browser will not send any information to Google Analytics.

By default, extensions do not run when you’re using Google Chrome in Incognito mode.   You’d likely want to keep Analytics from tracking your private browsing, too, so open the Extensions page in Chrome and check the Allow this extension to run in incognito box.

Internet Explorer
When you click the button to install the add-on in Internet Explorer, you’ll be asked to accept a license agreement.  Click Accept and Install.

The add-on will then automatically download and install.  If you’re using Vista or Windows 7, you may have to approve a UAC prompt to complete the installation.  Then click Restart Browser Now to run the add-on and keep your data away from Google Analytics.

Unfortunately, the Internet Explorer add-on installs as a normal Windows application.  If you choose to remove it in the future, open Control Panel, select Uninstall a Program, and then select the Analytics Opt-out Browser Add-on to uninstall it.

Firefox
You’ll see a similar license agreement when installing the Add-on in Firefox as you do in Internet Explorer.  Click Accept and Install.  Firefox may warn you that it blocked a site from installing software on your computer; click Allow to let it install.

Click Install Now in the popup window to confirm that you want to install it.

Once the extension is downloaded and installed, restart Firefox as usual for it to take effect.

Opt out of Personalized AdSense Ads
Google’s AdSense is one of the most popular ad networks on the internet.  It appears on Google services, such as Search and Gmail, but is also commonly used on many sites across the net.  AdSense ads are generally based on the content of the page you’re reading, but they will also personalize to your interests that Google learns from the sites you visit over time.
If you’d like to opt-out of this personalization, visit the Google Ads Preference Manager (link below).  Here you’ll see a list of your interests that Google has stored in cookies on your computer.  You can click the Remove link beside any of them to remove that category from your personalization.

Or, you can simply opt-out of personalized ads by clicking the Opt out button near the bottom of the page.  This will disable the tracking cookie, and now your ads will either be purely random or based only on the content of the page you’re visiting.

Please note that this setting is actually stored in a cookie, so if you delete your cookies you’ll actually need to go back and opt out again.  Also, if you use multiple browsers, you’ll need to opt out in each browser you use.
Conclusion
With these two simple tricks, you can reduce the amount of information that you automatically give Google every day.  If you are a tin foil hat type, this may make you feel more secure online.
Links
Google Analytics Opt-out Browser Add-on
Opt out of Personalized Ads with Google Ads Preference Manager
Please note this is directly taken from a How to Geek tutorial and I though it would be useful sharing

One nick name for all the social networks

Wednesday, November 23, 2011 | comments (15)

image

If you can have one nick name in the virtual world you can easily brand your self. But how to find such a nick name? How can I know my screen name is available in other networks?
This is a simple tool you can use to find the networks your nick name is used. Simply enter your nick name and it will find you the social networks which already have that nick name and the networks that does not. You can pick different names and compare statistics to decide the nick name you choose.
The site is 

Secure your Facebook Account

| comments (12)

 
Like to see who is using your facebook account now or recently? Add a sms or email alert when someone access your facebook account?. Use these advanced features to protect your Facebook account from unauthorized access.
Following are basic methods you can use to secure your facebook accountUse this option when you access public wifi access points. This is listed under Account Settings Page under security section.You will be notified when ever an unlisted machine access your facebook account via sms or email (on your preference). This setting is also listed under Account Settings Page security section.You can see all the active sessions you have along with the location under Account Settings Page security section. End all the unwanted session listed there.If you have an facebook alerts enabled phone you can type “otp” and send it to 32665(FBOOK). This will reply you with a onetime use password you can use to log in when you use public machines or public wifi access points.

How to use a Proxy

Tuesday, November 22, 2011 | comments

 
Ever wanted to anonymously browse web, browse as you are in another country, watch TV series and Movies as they are telecasted , Get visitors for your blog around the world?
According to Wikipedia proxy is a computer network service that allows clients to make indirect network connections to other network services. When you open a web site it will get your IP address from which they can identify the country you are connecting from. Using a proxy you can change the country you are connecting from. ·         Access any restricted sites·         Watch TV series and movies available free on other countries (Some countries like USA, UK allow all their TV channels to be viewed online free for all the USA citizens.)·         Play with low pings on the game servers which are not in your country.·         Hide your identity from the site records·         Hide your identity from the network (Network administrator will not be able to track the pages you visit since you are using a tunnel to browse)·         Hide records on the machine (You can encode the web address and the other will not be able to understand them)·         To keep machines behind it anonymous (mainly for security)·         To speed up access to resources (using caching). Web proxies are commonly used to cache web pages from a web server. ·         To apply access policy to network services or content, e.g. to block undesired sites.·         To log / audit usage, i.e. to provide company employee Internet usage reporting.·         To bypass security/ parental controls.·         To scan transmitted content for malware before delivery.·         To scan outbound content, e.g., for data leak protection.·         To circumvent regional restrictions.Since we are connecting through another site, your security is not assured. These site may have system to record your details and it is recommended not use any login information on a site you accessed through a proxy!!This is mainly used to access web sites. You simply need to enter the web address on those sites and you will be taken in to that using through another site. This is a good solution if you only want to browse web using a proxy. Some proxy sites only allow html to be bypassed. So you videos and flash content will not be visible on the page. However there are some good proxies which allow all the content. You can find so many web proxies listing on the internet. Just search for Proxy on the internet. (Google search for web Proxies).This is the other option you can use. This will bypass all the network connection on the machine thorough a proxy. If you are have Windows Media Center or HULU desktop you can use this option to watch TV series online free. This is little complicated and the step you need to follow are below on the tutorial. There are 3 types of System proxies§  Transparent Proxy – IP address can be caught, such proxies usually used to increase internet speed and decrease amount of abroad traffic (some internet providers grant their user free local traffic).        Browse restricted sites you does not care about sharing your identity        Watch TV series. (This is a speed connection and will allows fast streaming but some sites identify this. Then use a anonymous proxy.) §  Anonymous Proxy – IP address can not be caught by server but server knows that proxy was used during connection. It is very useful to be anonymous surfing in internet .        Watch TV series if above fails §  Elite Proxy – IP address as well as fact that proxy was used during connection can not be caught by server. Best way to hide any information about you presence in internet.1.       Find a proxy server. It will be in the format of 192.145.164.124:8080. In that IP address 192.145.164.124 is the proxy and the 8080 is the port. (You can find proxy IP address on some sites. Use one of the following options. Google search for proxy. Proxy List.)2.       If you use windows machine, open internet explorer. Go to Tools-> Internet Options. You can go there using the control panel as well.3.       Go to Connections tab and click on the LAN settings button. On the new window tick on the last tick box and enter the proxy.4.       Click OK and Apply the settings and click OK on the parent window.·         When you set up the system proxy, you can browse web using IE or Chrome or any other software. (except firefox. If you want to use firefox go to its settings (Tools->Options) open Network Tab click Settings Button-> Select Use system proxy settings)·         Some proxies listed may not available all the time. If not try a new proxy.

Save and Retrieve Multiple Tabs on Browsers

Monday, November 21, 2011 | comments (1)

 Do you have a web browsing procedure? Sites that you visit everyday like facebook, gmail? Want to open them on different tabs every time you start your browser?  Or a list of sites you want to start at once?
This short tutorial will show you how to save and retrieve multiple tabs on you browser. This is really a useful feature. You might look for some details and you want to retrieve those tabs later you want them. This works irrespective of the browser you use.
Save Tabs 
Open the tabs you want and right click them and click Bookmark All Tabs. It will be saved on your bookmarks. You can add new bookmarks to that group as well.To retrieve just right click on the group and select Open All Tabs.
Save as Homepage
If you want a set of home pages to be open when the browser runs instead of the classical homepage, just add the list of URLs separated by a "|" or "%7C"

Windows Shortcut Keys

Friday, November 18, 2011 | comments (13)


  Mastering the keyboard will not only increase your navigation speed but it can also help with wrist fatigue. Here are some lesser known Windows shortcuts to help you become a keyboard ninja. Win + Tab beautiful tab explorer Win+1, 2, 3, 4, etc. will launch each program in your taskbar. It is helpful then to keep your most used programs at the beginning of your task bar so you can open them one right after another. This also works in Windows Vista for the quick launch icons. Win+Alt+1, 2, 3, etc. will open the jump list for each program in the taskbar. You can then use your arrows to select which jump list option you want to open. Ctrl+Shift+Esc will open the task manager without needing to hit Ctrl+Alt+Del first. Win+T will cycle through taskbar programs. This is similar to just hovering over the item with your mouse but you can launch the program with Space or Enter.Ctrl+Shift+N creates a new folder in your current directory.Ctrl + Tab or Ctrl + Shift + Tab move though tabs of the web browser F2 renames a file or folder.Win+B selects the system tray which isn’t always useful but can come in very handy if your mouse stops working. F3 will open explorer and select the search bar. If you already have an explorer window open it will highlight the search bar. In some programs it will also open the search dialog to search within that program.Win+Up/Down maximizes and restores down the current window so long as that window has the option to be maximized. It is exactly the same as clicking on the middle button on your windows.Ctrl + Alt + Arrow keys change the direction of the screen.Win + Arrow Keys put the current window maximized or to a sideFor more shortcuts

Wanna Hide your IP - SuperHideIP

Saturday, April 30, 2011 | comments (3)


So Friends,Many people ask for hiding IP.There are many softwares on internet for this.Something is not safe.So I am going to give you a better software to hide your IP address.This cost $29.95.Don't worry you can download full version here.
 
Support : Sanjaya Einy | Blogger Tricks Templatee
Copyright © 2011. Tips and Tricks NET - All Rights Reserved
Template Created by Creating Website Published by Mas Template
Proudly powered by Premium Blogger Template